Keep in mind the Azure MFA NPS extension is currently in public preview.
In February 2017, Microsoft released an Azure MFA extension for their Network Policy Server (NPS), Microsoft’s RADIUS server. This new plugin is designed to allow us to easily apply multi-factor authentication requirements to any RADIUS compatible service such as VPN or RD Gateway without the need for an on-premises Azure MFA Server. The NPS extension integrates directly with Azure MFA in the cloud.
In this post I will show you how to use the new Azure MFA NPS extension to protect Remote Desktop Gateway deployments.
Requirements
- You will need an RD Gateway server and a separate NPS server. You cannot install the Azure MFA extension on your RD Gateway server.
- Azure MFA licensing must be enabled on your tenant. Do not attempt to proceed with these instructions before subscribing to a license including Azure MFA (Azure AD Premium, EMS, or MFA subscription). If you do, the NPS configuration script will failed with an error such as: “Service principal was not found”.
- Your test user must have an applicable license assigned, and have a device enrolled in Azure MFA.
Setup a central NPS server
If you do not already have a central NPS server (not the RD gateway server) build a new server and install the NPS role via Roles and Features. Keep in mind, once the Azure MFA NPS plugin is installed, ALL NPS authentications on this server will require MFA. You will need a separate NPS server if you have applications which should not prompt for MFA.
Once the NPS role is installed you will need to create a Connection Request Policy and a Network Policy to control authentication for RD Gateway requests. You can model these after the existing policies on your RD Gateway server. Here is what I used:


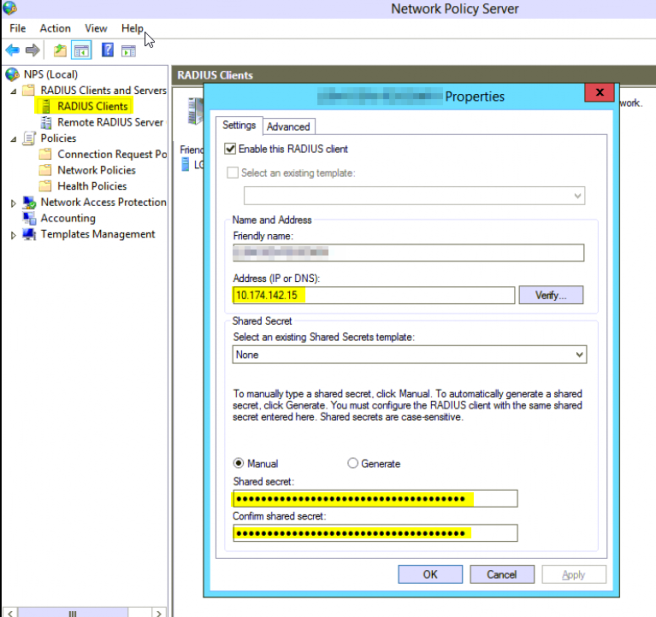
Now add your RD Gateway server(s) under RADIUS clients on your central NPS server, set a Shared secret and save it for later.
Now stop here, and move onto configuring the RD Gateway server.
Configure the RD Gateway server
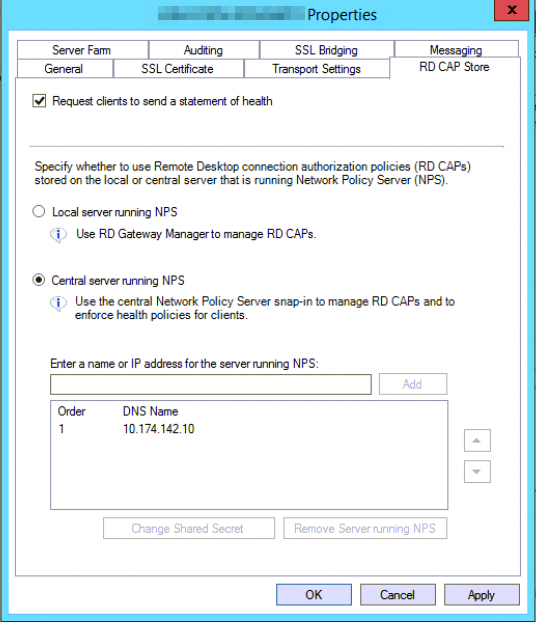
On your RD Gateway server, open the RD Gateway Manager and edit the server properties. On the RD CAP Store tab, select Central server running NPS and add your central NPS server IP address and shared secret.
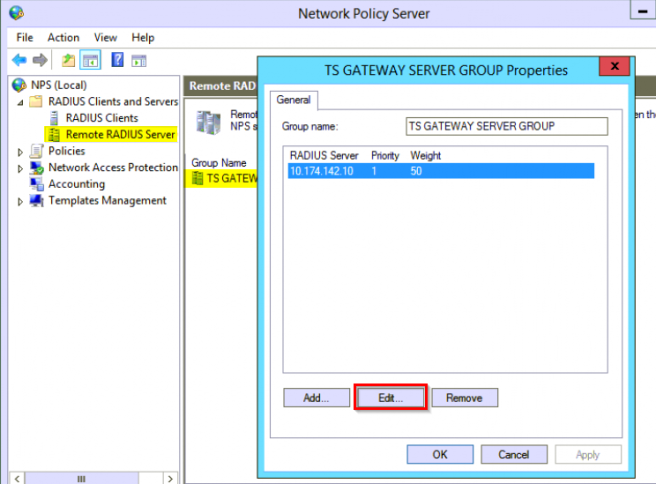
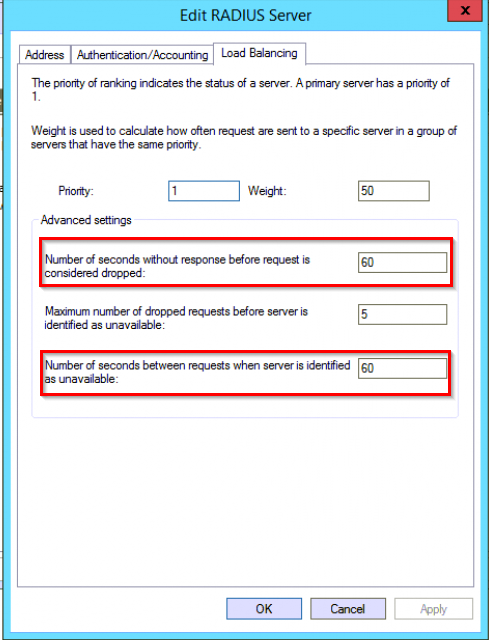
Still on the RD Gateway server, open the Network Policy Server console and find your central NPS server in the TS Gateway Server Group. Edit the server and adjust the authentication timeouts to allow enough time for MFA processing.
Validate your central NPS setup
At this point you can test if your central NPS server is properly handling authentication requests from your RD Gateway server. Try launching an RDP session through your gateway. This should work as before, only now the authentication is happening on your central NPS server.
Setup the Azure MFA NPS plugin
If the above test was successful, you are now ready to add in MFA. Back on your central NPS server, install the Azure MFA plugin and prerequisites
Install Prerequisites:
The following is required:
- Visual C++ Redistributable Packages for Visual Studio 2013 (X64)
- Microsoft Azure Active Directory Module for Windows PowerShell version 1.1.166.0
Install the NPS Plugin:
https://www.microsoft.com/en-us/download/details.aspx?id=54688
Pay attention to the install instructions on that page, especially if you have an older version of powershell installed.
Configure the plugin
Once the plugin is installed, it must be configured. Microsoft supplies a powershell script for this. Open Powershell as an Administrator and run the following script:
C:\Program Files\Microsoft\AzureMfa\Config\AzureMfaNpsExtnConfigSetup.ps1
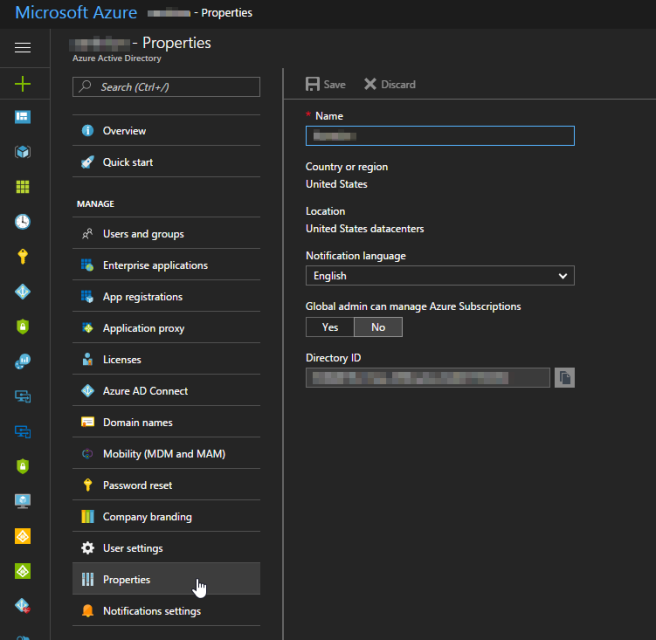
The script will ask for your Azure Active Directory Tenant ID. You can find this in the Azure Portal, under Azure Active Directory > Properties > Directory ID
Once the script completes you should now be prompted for MFA on your next RD Gateway login.
